目录
实验目的:运行的虚拟机可以在线平滑迁移,不会终端虚拟机运行的业务 高可用架构:
pacemaker+corosync 并由 pcs 进行管理 系统环境:三台机器都是最新的 centos7.6 所需组
件: DLM,gfs2,clvm,pcs,pacemeker,corosync,libvirtd,qemu,qemu-img 约束关系:
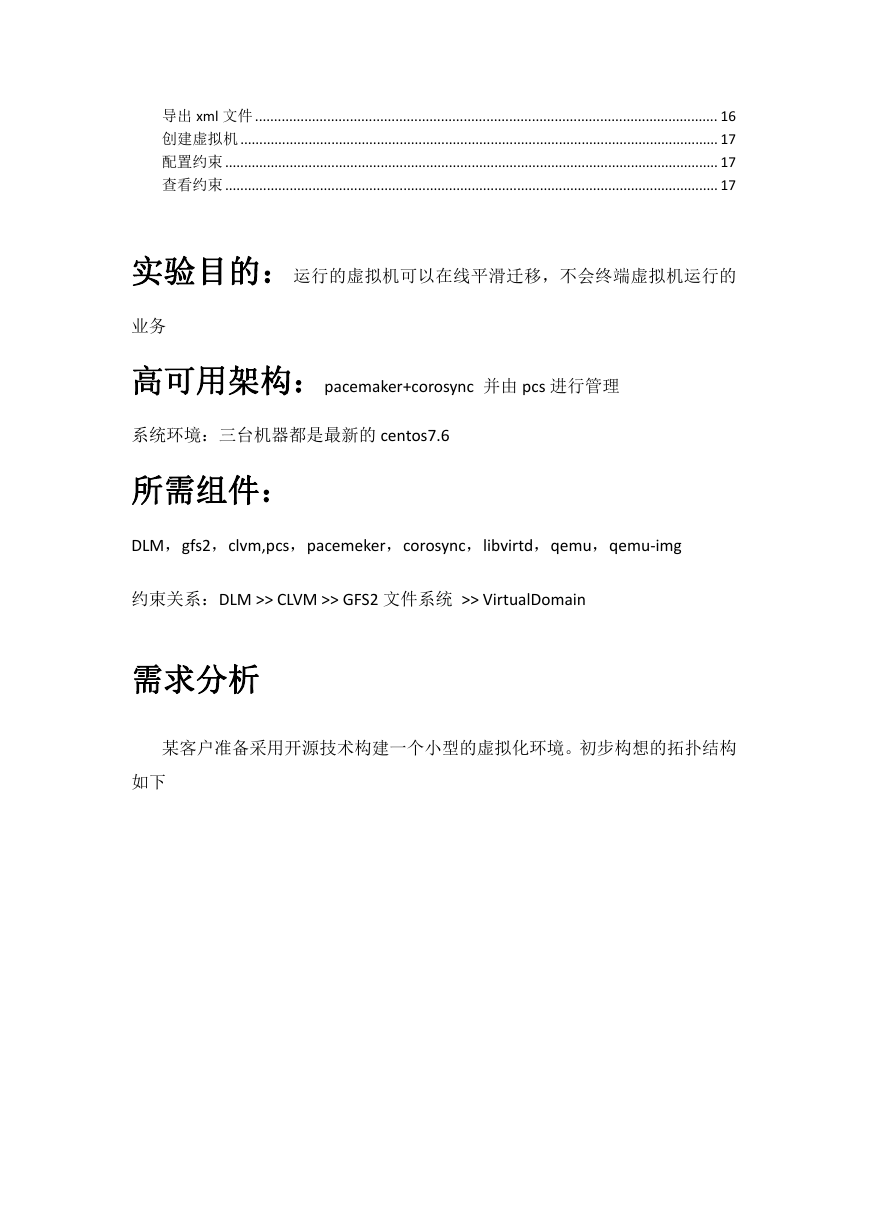
DLM >> CLVM >> GFS2 文件系统 >> VirtualDomain........................................................................2
需求分析 ............................................................................................................................................ 2
一、准备阶段:................................................................................................................................ 3
1.1、基础环境配置 ...................................................................................................................3
修改主机名........................................................................................................................ 4
网络:................................................................................................................................ 4
做主备链路聚合................................................................................................................ 4
修改主机映射 .................................................................................................................... 5
配置 yum 源.......................................................................................................................6
配置 ssh..............................................................................................................................6
关闭防火墙........................................................................................................................ 7
1.2 KVM 宿主机节点软件安装................................................................................................. 7
1.3 集群软件包安装.................................................................................................................7
二、ISCSI 服务器的配置 ................................................................................................................... 9
安装 targetcli 软件包.................................................................................................................9
新建两个磁盘,...................................................................................................................... 10
计算节点修改 iqn....................................................................................................................10
发现 iscsi 端 iqn....................................................................................................................... 10
连接:...................................................................................................................................... 11
三、配置 STONITH 隔离设备, DLM 分布式锁 和 gfs2 文件系统 ...............................................11
3.1 配置 stonith 仲裁设备 ......................................................................................................11
添加资源 .......................................................................................................................... 11
使用 sdb 的 wwn 号做 stonith 隔离设备 .......................................................................11
3.2 配置 dlm 分布锁................................................................................................................12
3.3 修改 lvm 的配置默认值 ....................................................................................................12
重启查看状态 .......................................................................................................................... 13
3.4 向集群中添加 clvm 资源 .................................................................................................. 13
添加克隆的资源..............................................................................................................13
查看约束:...................................................................................................................... 13
添加约束:...................................................................................................................... 13
3.5 在集群中创建 lvm,并挂载 gfs2 文件系统 ....................................................................14
创建磁盘 .......................................................................................................................... 14
添加克隆资源 .................................................................................................................. 15
设置 selinux......................................................................................................................15
四、创建虚拟机及迁移 .................................................................................................................. 15
创建虚拟磁盘 .......................................................................................................................... 16
安装 kvm.................................................................................................................................. 16
迁移测试 .................................................................................................................................. 16
�
导出 xml 文件 .......................................................................................................................... 16
创建虚拟机.............................................................................................................................. 17
配置约束 .................................................................................................................................. 17
查看约束 .................................................................................................................................. 17
实验目的:运行的虚拟机可以在线平滑迁移,不会终端虚拟机运行的
业务
高可用架构:pacemaker+corosync 并由 pcs 进行管理
系统环境:三台机器都是最新的 centos7.6
所需组件:
DLM,gfs2,clvm,pcs,pacemeker,corosync,libvirtd,qemu,qemu-img
约束关系:DLM >> CLVM >> GFS2 文件系统 >> VirtualDomain
需求分析
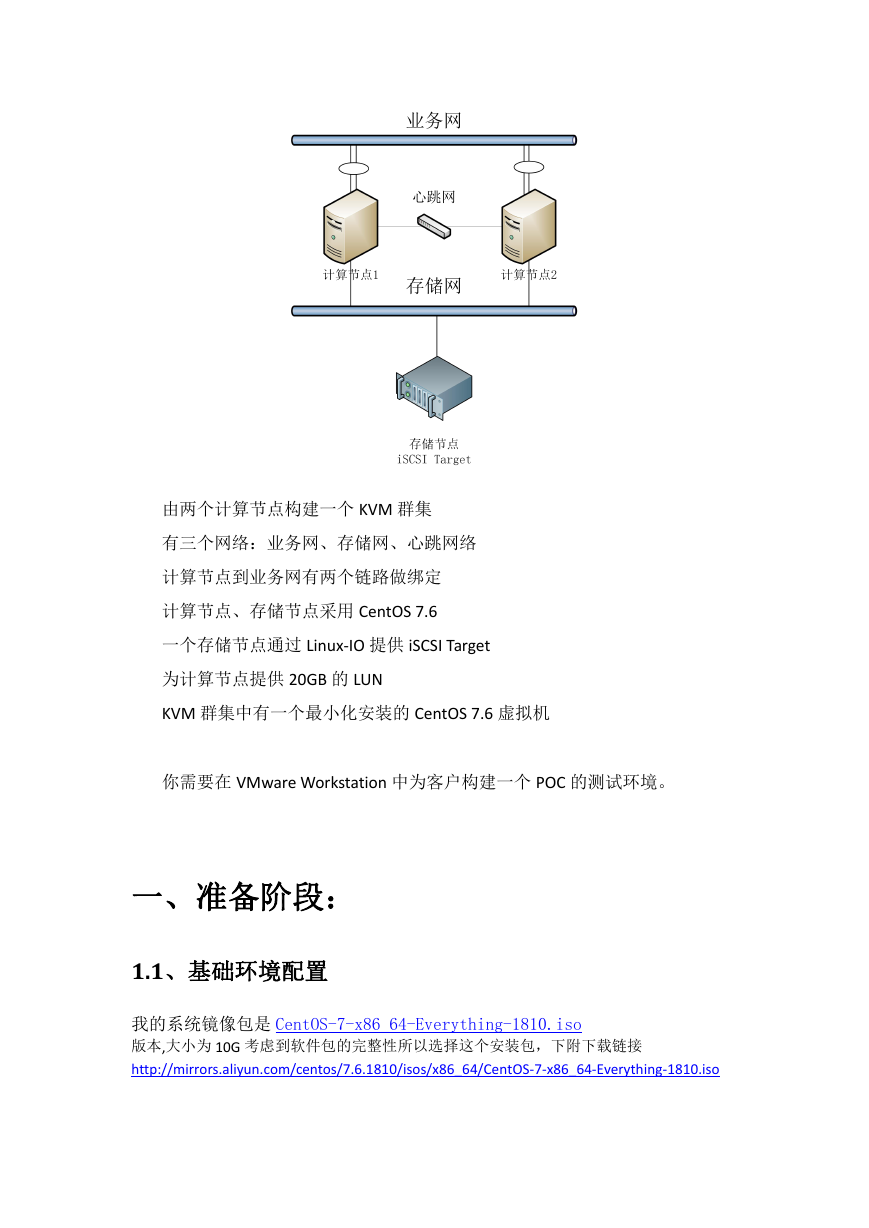
某客户准备采用开源技术构建一个小型的虚拟化环境。初步构想的拓扑结构
如下
�
由两个计算节点构建一个 KVM 群集
有三个网络:业务网、存储网、心跳网络
计算节点到业务网有两个链路做绑定
计算节点、存储节点采用 CentOS 7.6
一个存储节点通过 Linux-IO 提供 iSCSI Target
为计算节点提供 20GB 的 LUN
KVM 群集中有一个最小化安装的 CentOS 7.6 虚拟机
你需要在 VMware Workstation 中为客户构建一个 POC 的测试环境。
一、准备阶段:
1.1、基础环境配置
我的系统镜像包是 CentOS-7-x86_64-Everything-1810.iso
版本,大小为 10G 考虑到软件包的完整性所以选择这个安装包,下附下载链接
http://mirrors.aliyun.com/centos/7.6.1810/isos/x86_64/CentOS-7-x86_64-Everything-1810.iso
�
修改主机名
主机映射、网络、ssh、yum、防火墙
hostnamectl set-hostname iscsi
hostnamectl set-hostname node1
hostnamectl set-hostname node2
网络:
192.168.1.0 段为存储网络
192.168.2.0 段为心跳网络
192.168.3.0 段为业务网络
Iscsi 节点
192.168.1.14
Node1 节点
192.168.1.15
192.168.2.134
192.168.3.11
Node2 节点
192.168.1.16
192.168.2.135
192.168.3.12
两个计算节点添加 4 块网卡,其中两块网卡
做主备链路聚合
nmcli connection add type team con-name team0 ifname team0 config '{"runner": {"name":
"activebackup"}}'
�
nmcli connection modify team0 ipv4.addresses 192.168.3.10
nmcli connection modify team0 ipv4.method manual
nmcli connection add type team-slave con-name team0-port1 ifname ens38 master team0
nmcli connection add type team-slave con-name team0-port2 ifname ens39 master team0
重启服务:
systemctl restart network
查看 team0 状态
[root@node1 ~]# teamdctl team0 stat
setup:
runner: activebackup
ports:
ens38
link watches:
link summary: up
instance[link_watch_0]:
name: ethtool
link: up
down count: 0
ens39
link watches:
link summary: up
instance[link_watch_0]:
name: ethtool
link: up
down count: 0
runner:
active port: ens38
修改主机映射
192.168.1.14 iscsi
�
192.168.1.15 node1
192.168.2.134 node1-xt
192.168.3.11 node1-yw
192.168.1.16 node2
192.168.2.135 node2-xt
192.168.3.12 node-yw
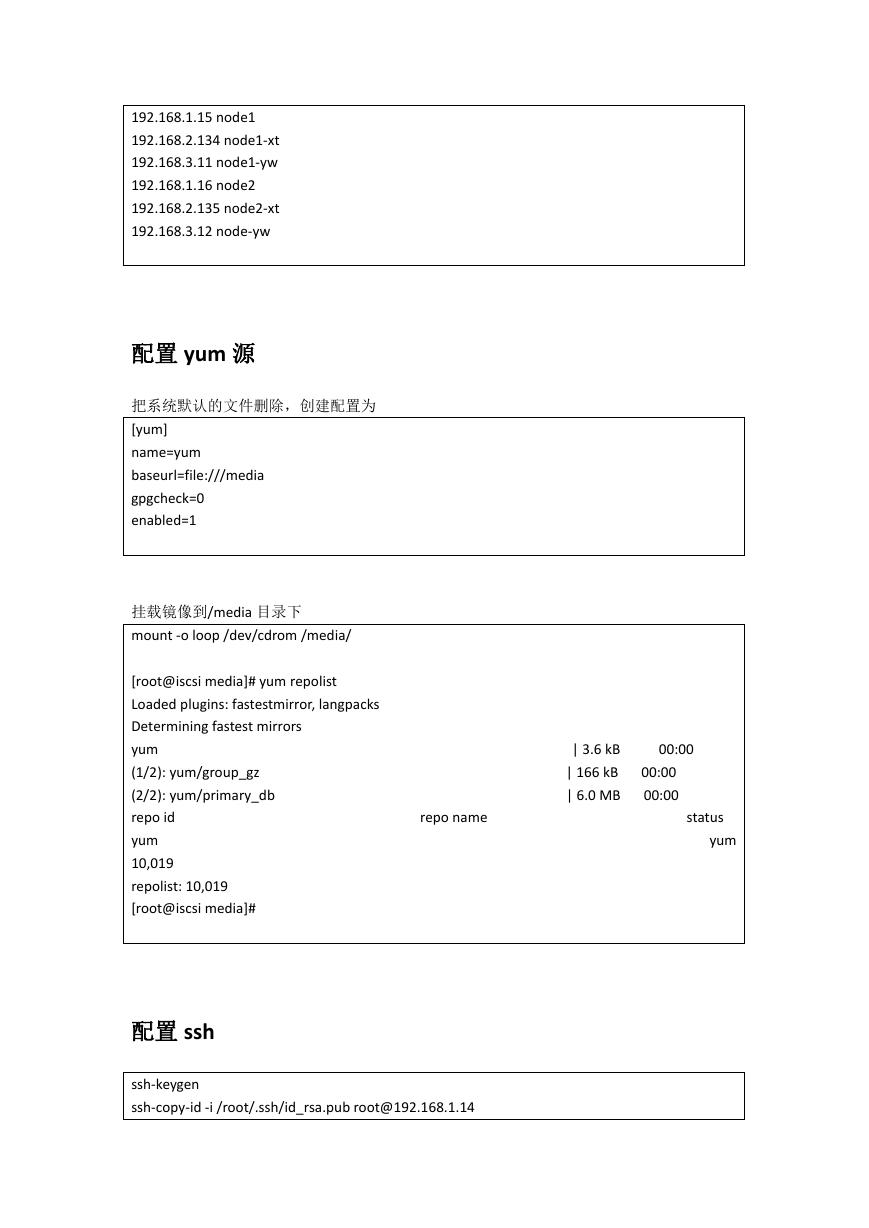
配置 yum 源
把系统默认的文件删除,创建配置为
[yum]
name=yum
baseurl=file:///media
gpgcheck=0
enabled=1
挂载镜像到/media 目录下
mount -o loop /dev/cdrom /media/
[root@iscsi media]# yum repolist
Loaded plugins: fastestmirror, langpacks
Determining fastest mirrors
yum
(1/2): yum/group_gz
(2/2): yum/primary_db
repo id
yum
10,019
repolist: 10,019
[root@iscsi media]#
repo name
| 3.6 kB
| 166 kB
| 6.0 MB
00:00
00:00
00:00
status
yum
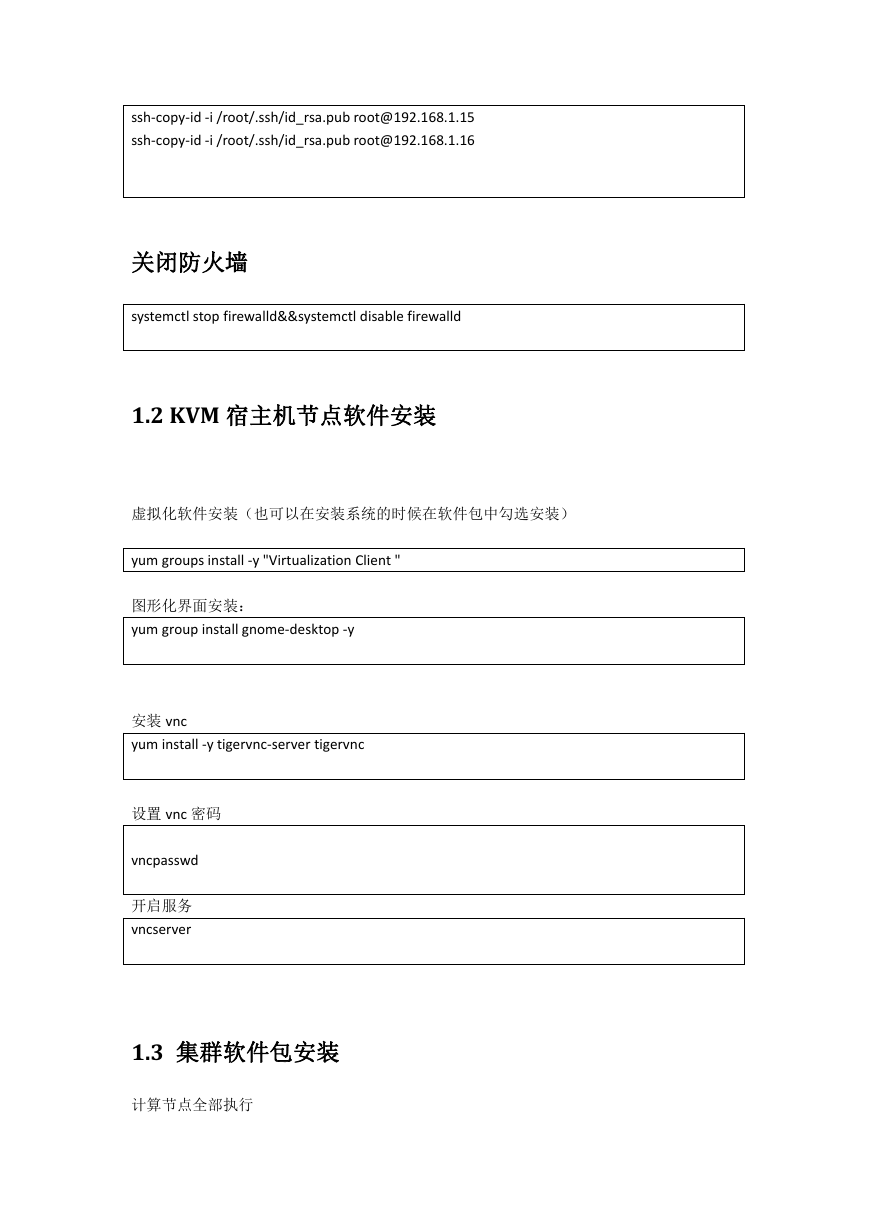
配置 ssh
ssh-keygen
ssh-copy-id -i /root/.ssh/id_rsa.pub root@192.168.1.14
�
ssh-copy-id -i /root/.ssh/id_rsa.pub root@192.168.1.15
ssh-copy-id -i /root/.ssh/id_rsa.pub root@192.168.1.16
关闭防火墙
systemctl stop firewalld&&systemctl disable firewalld
1.2 KVM 宿主机节点软件安装
虚拟化软件安装(也可以在安装系统的时候在软件包中勾选安装)
yum groups install -y "Virtualization Client "
图形化界面安装:
yum group install gnome-desktop -y
安装 vnc
yum install -y tigervnc-server tigervnc
设置 vnc 密码
vncpasswd
开启服务
vncserver
1.3 集群软件包安装
计算节点全部执行
�
yum install bash-completion ntpdate tigervnc-server iscsi-initiator-utils pacemaker corosync pcs
psmisc policycoreutils-python fence-agents-all dlm lvm2-cluster gfs2-utils
–y
systemctl start pcsd
systemctl enable pcsd
1.4 配置 pcs 守护进程
创建密码
echo "lgmlgm" | passwd --stdin hacluster
单节点运行:
测试登录
[root@node1 ~]# pcs cluster auth node1 node2 -u hacluster -p lgmlgm
node1: Authorized
node2: Authorized
生成 corosync 配置文件
[root@node1 ~]# pcs cluster setup --name kvm-ha-cluster node1 node2
Destroying cluster on nodes: node1, node2...
node2: Stopping Cluster (pacemaker)...
node1: Stopping Cluster (pacemaker)...
node1: Successfully destroyed cluster
node2: Successfully destroyed cluster
Sending 'pacemaker_remote authkey' to 'node1', 'node2'
node2: successful distribution of the file 'pacemaker_remote authkey'
node1: successful distribution of the file 'pacemaker_remote authkey'
Sending cluster config files to the nodes...
node1: Succeeded
node2: Succeeded
Synchronizing pcsd certificates on nodes node1, node2...
node1: Success
node2: Success
Restarting pcsd on the nodes in order to reload the certificates...
node1: Success
�





 2023年江西萍乡中考道德与法治真题及答案.doc
 2012年重庆南川中考生物真题及答案.doc
 2013年江西师范大学地理学综合及文艺理论基础考研真题.doc
 2020年四川甘孜小升初语文真题及答案I卷.doc
 2020年注册岩土工程师专业基础考试真题及答案.doc
 2023-2024学年福建省厦门市九年级上学期数学月考试题及答案.doc
 2021-2022学年辽宁省沈阳市大东区九年级上学期语文期末试题及答案.doc
 2022-2023学年北京东城区初三第一学期物理期末试卷及答案.doc
 2018上半年江西教师资格初中地理学科知识与教学能力真题及答案.doc
 2012年河北国家公务员申论考试真题及答案-省级.doc
 2020-2021学年江苏省扬州市江都区邵樊片九年级上学期数学第一次质量检测试题及答案.doc
 2022下半年黑龙江教师资格证中学综合素质真题及答案.doc