logo资料库

ACER笔记本电脑-TravelMate330说明书.pdf

第1页 / 共146页
第2页 / 共146页
第3页 / 共146页
第4页 / 共146页
第5页 / 共146页
第6页 / 共146页
第7页 / 共146页
第8页 / 共146页
资料共146页,剩余部分请下载后查看
TravelMate 330 Series Notebook Computer
Caution
Connecting the Computer
Getting Help Online
Support Information
Care and Maintenance
Getting Familiar with your Computer
Features
Performance
Multimedia
Connectivity
Human-centric Design and Ergonomics
Expansion
Display
Video Performance
Simultaneous Display
Power Management
Dual Display
Opening and Closing the Display
Indicators
Keyboard
Special Keys
Lock Keys
Embedded Numeric Keypad
Windows Keys
Hot Keys
The Euro Symbol
Keyboard Ergonomics
Touchpad
Touchpad Basics
Customizing the Center Button
Storage
Hard Disk
EasyLink™ Combo Drive
Connecting and Disconnecting the EasyLink™ Combo Drive
Ejecting Media
Ejecting a Floppy Disk
Ejecting the CD-ROM or DVD-ROM Tray
Playing DVD Movies
Ports
Left Port
Rear Ports
Fax/Data Modem
Fast Infrared
Universal Serial Bus
Right Ports
PC Card Slot
Inserting a Card
Ejecting a Card
Audio
Adjusting the Volume
Enabling the 3D Effect Feature
Securing your Computer
Security Notch
Passwords
Setting a Password
Operating on Battery Power
Battery Pack
Battery Pack Characteristics
Using a Battery Pack for the First Time
Replacing the Battery Pack
Charging the Battery
Charging Modes
Rapid mode
Charge-in-use mode
Trickle mode
Checking the Battery Level
Using the Windows Battery Meter
Optimizing Battery Life
Battery-low Warning
Power Management
Power Management Modes
Display Standby Mode
"Automatic Dim" Feature
Hard Disk Standby Mode
Standby Mode
Hibernation Mode
Sleep Mode (ACPI)
Advanced Power Management
Advanced Configuration and Power Interface
Peripherals and Options
External Monitor
Setting Up Dual Display
Printer
External Pointing Device
External PS/2 Mouse
External Serial Mouse
External USB Mouse
External Keyboard and Keypad
Audio Devices
PC Cards
USB Devices
Miscellaneous Options
Additional Power Packs
Battery Pack
AC Adapter
External Battery Charger
Cables
PS/2 Y-Bridge Cable
File Transfer Cable
Key Component Upgrades
Memory Upgrade
Installing Memory
Hard Disk Upgrade
Installing a Replacement Hard Disk
Moving with your Computer
Disconnecting from the Desktop
Moving Around
Preparing the Computer
What To Bring to Short Meetings
What To Bring to Long Meetings
Taking the Computer Home
Preparing the Computer
What To Bring with You
Special Considerations
Setting Up a Home Office
Traveling with the Computer
Preparing the Computer
What To Bring with You
Special Considerations
Traveling Internationally with the Computer
Preparing the Computer
What To Bring with You
Special Considerations
Software
Sleep Manager
Accessing the Sleep Manager
Sleep Manager Functions
Create
Remove
Minimize
Exit
Notebook Manager
Information Viewer
POST
Boot Sequence
Password
Setting the Power-On Password
Setting the Setup Password
Power Management
Setting Advanced Features
Display Device
BIOS Utility
Using the BIOS Utility
System Information
Basic System Settings
Startup Configuration
Setting the Boot Drive Sequence
Onboard Devices Configuration
System Security
Setting a Password
Removing a Password
Changing a Password
Power Management
Load Default Settings
Troubleshooting
Frequently-Asked Questions
I pressed the power switch and opened the display, but the computer does not start or boot-up.
Nothing appears on the screen.
Image is not full-screen.
No audio is heard from the computer.
I want to eject the CD-ROM or DVD-ROM tray without turning on the power. I cannot eject the CD-RO...
The keyboard does not respond.
The serial mouse does not work.
I prefer using an external keyboard and mouse, but both have PS/2 connectors and there is only on...
The printer does not work.
The infrared port does not work.
I want to set up my location to use the internal modem.
I get a “Not Enough Space for Allocation” error message from the Sleep Manager program.
Troubleshooting Tips
Using PC-Doctor
Online Services
Before you call
Error Messages
Specifications
Microprocessor
Memory
Data Storage
Display and Video
Audio
Keyboard and Pointing Device
I/O Ports
Weight and Dimensions
Temperature
Humidity (non-condensing)
System
Battery Pack
AC Adapter
Options
330.book Page 1 Friday, March 5, 1999 11:08 AM TravelMate 330 Series Notebook Computer User’s Guide
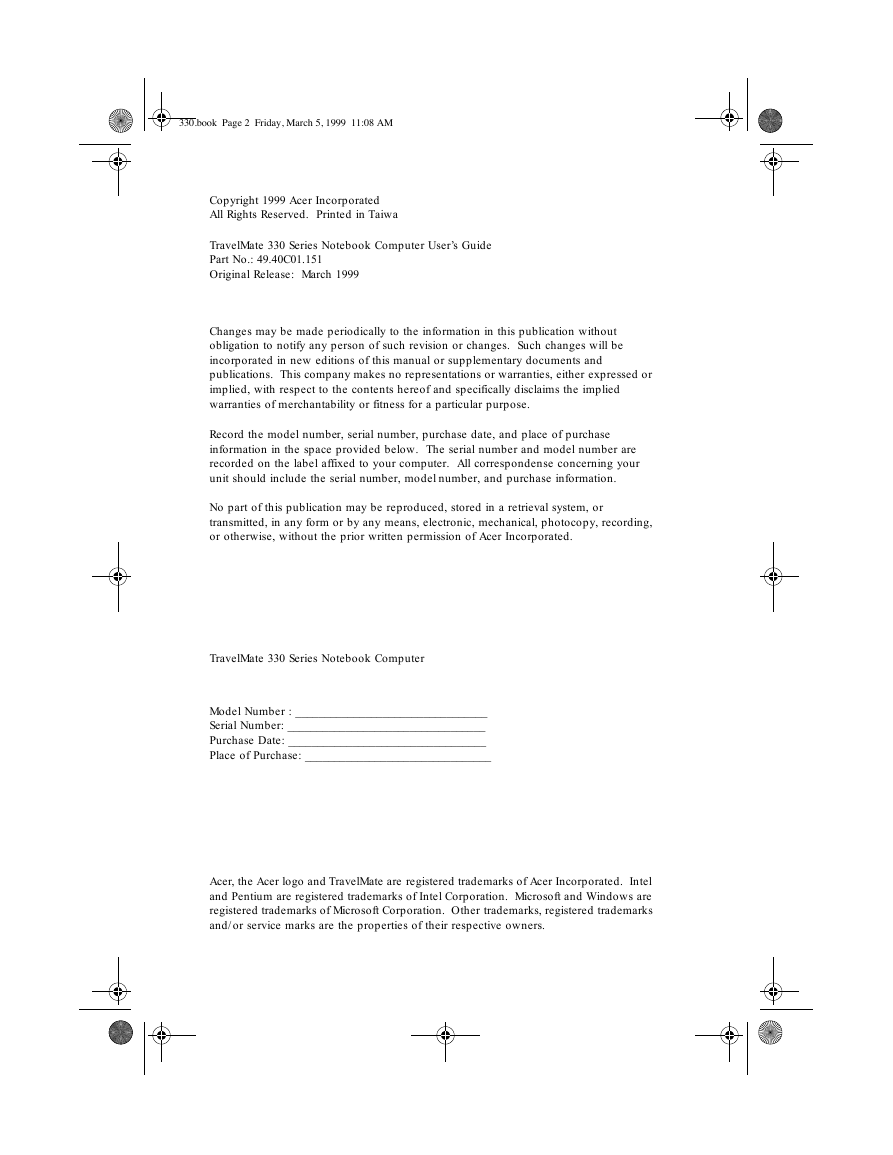
330.book Page 2 Friday, March 5, 1999 11:08 AM Copyright 1999 Acer Incorporated All Rights Reserved. Printed in Taiwa TravelMate 330 Series Notebook Computer User’s Guide Part No.: 49.40C01.151 Original Release: March 1999 Changes may be made periodically to the information in this publication without obligation to notify any person of such revision or changes. Such changes will be incorporated in new editions of this manual or supplementary documents and publications. This company makes no representations or warranties, either expressed or implied, with respect to the contents hereof and specifically disclaims the implied warranties of merchantability or fitness for a particular purpose. Record the model number, serial number, purchase date, and place of purchase information in the space provided below. The serial number and model number are recorded on the label affixed to your computer. All correspondense concerning your unit should include the serial number, model number, and purchase information. No part of this publication may be reproduced, stored in a retrieval system, or transmitted, in any form or by any means, electronic, mechanical, photocopy, recording, or otherwise, without the prior written permission of Acer Incorporated. TravelMate 330 Series Notebook Computer Model Number : _________________________________ Serial Number: __________________________________ Purchase Date: __________________________________ Place of Purchase: ________________________________ Acer, the Acer logo and TravelMate are registered trademarks of Acer Incorporated. Intel and Pentium are registered trademarks of Intel Corporation. Microsoft and Windows are registered trademarks of Microsoft Corporation. Other trademarks, registered trademarks and/or service marks are the properties of their respective owners.
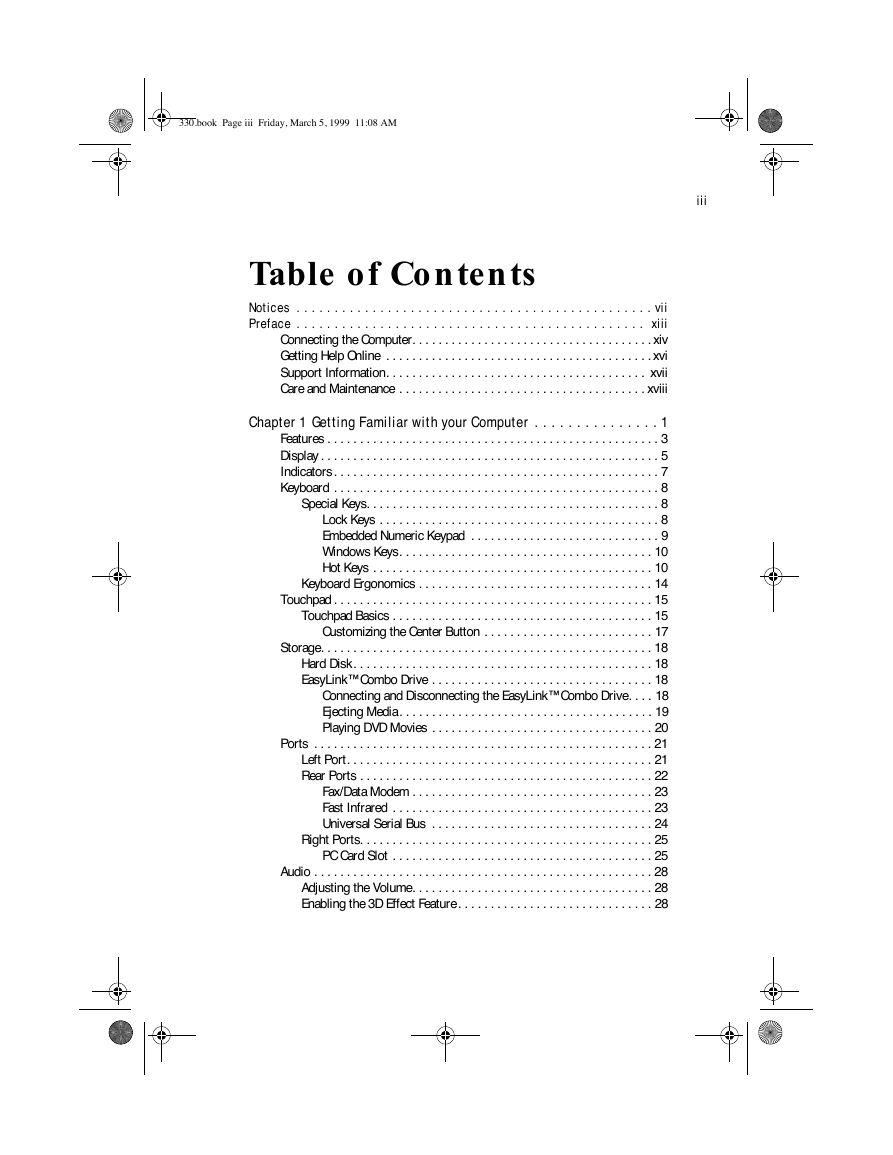
330.book Page iii Friday, March 5, 1999 11:08 AM iii Table of Contents Notices . . . . . . . . . . . . . . . . . . . . . . . . . . . . . . . . . . . . . . . . . . . . . . . vii Preface . . . . . . . . . . . . . . . . . . . . . . . . . . . . . . . . . . . . . . . . . . . . . . xiii Connecting the Computer. . . . . . . . . . . . . . . . . . . . . . . . . . . . . . . . . . . . . xiv Getting Help Online . . . . . . . . . . . . . . . . . . . . . . . . . . . . . . . . . . . . . . . . . xvi Support Information. . . . . . . . . . . . . . . . . . . . . . . . . . . . . . . . . . . . . . . . xvii Care and Maintenance . . . . . . . . . . . . . . . . . . . . . . . . . . . . . . . . . . . . . . xviii Chapter 1 Getting Familiar with your Computer . . . . . . . . . . . . . . . 1 Features . . . . . . . . . . . . . . . . . . . . . . . . . . . . . . . . . . . . . . . . . . . . . . . . . . . 3 Display . . . . . . . . . . . . . . . . . . . . . . . . . . . . . . . . . . . . . . . . . . . . . . . . . . . . 5 Indicators . . . . . . . . . . . . . . . . . . . . . . . . . . . . . . . . . . . . . . . . . . . . . . . . . . 7 Keyboard . . . . . . . . . . . . . . . . . . . . . . . . . . . . . . . . . . . . . . . . . . . . . . . . . . 8 Special Keys. . . . . . . . . . . . . . . . . . . . . . . . . . . . . . . . . . . . . . . . . . . . . 8 Lock Keys . . . . . . . . . . . . . . . . . . . . . . . . . . . . . . . . . . . . . . . . . . . 8 Embedded Numeric Keypad . . . . . . . . . . . . . . . . . . . . . . . . . . . . . 9 Windows Keys. . . . . . . . . . . . . . . . . . . . . . . . . . . . . . . . . . . . . . . 10 Hot Keys . . . . . . . . . . . . . . . . . . . . . . . . . . . . . . . . . . . . . . . . . . . 10 Keyboard Ergonomics . . . . . . . . . . . . . . . . . . . . . . . . . . . . . . . . . . . . 14 Touchpad . . . . . . . . . . . . . . . . . . . . . . . . . . . . . . . . . . . . . . . . . . . . . . . . . 15 Touchpad Basics . . . . . . . . . . . . . . . . . . . . . . . . . . . . . . . . . . . . . . . . 15 Customizing the Center Button . . . . . . . . . . . . . . . . . . . . . . . . . . 17 Storage. . . . . . . . . . . . . . . . . . . . . . . . . . . . . . . . . . . . . . . . . . . . . . . . . . . 18 Hard Disk . . . . . . . . . . . . . . . . . . . . . . . . . . . . . . . . . . . . . . . . . . . . . . 18 EasyLink™ Combo Drive . . . . . . . . . . . . . . . . . . . . . . . . . . . . . . . . . . 18 Connecting and Disconnecting the EasyLink™ Combo Drive. . . . 18 Ejecting Media . . . . . . . . . . . . . . . . . . . . . . . . . . . . . . . . . . . . . . . 19 Playing DVD Movies . . . . . . . . . . . . . . . . . . . . . . . . . . . . . . . . . . 20 Ports . . . . . . . . . . . . . . . . . . . . . . . . . . . . . . . . . . . . . . . . . . . . . . . . . . . . 21 Left Port. . . . . . . . . . . . . . . . . . . . . . . . . . . . . . . . . . . . . . . . . . . . . . . 21 Rear Ports . . . . . . . . . . . . . . . . . . . . . . . . . . . . . . . . . . . . . . . . . . . . . 22 Fax/Data Modem . . . . . . . . . . . . . . . . . . . . . . . . . . . . . . . . . . . . . 23 Fast Infrared . . . . . . . . . . . . . . . . . . . . . . . . . . . . . . . . . . . . . . . . 23 Universal Serial Bus . . . . . . . . . . . . . . . . . . . . . . . . . . . . . . . . . . 24 Right Ports. . . . . . . . . . . . . . . . . . . . . . . . . . . . . . . . . . . . . . . . . . . . . 25 PC Card Slot . . . . . . . . . . . . . . . . . . . . . . . . . . . . . . . . . . . . . . . . 25 Audio . . . . . . . . . . . . . . . . . . . . . . . . . . . . . . . . . . . . . . . . . . . . . . . . . . . . 28 Adjusting the Volume. . . . . . . . . . . . . . . . . . . . . . . . . . . . . . . . . . . . . 28 Enabling the 3D Effect Feature . . . . . . . . . . . . . . . . . . . . . . . . . . . . . . 28
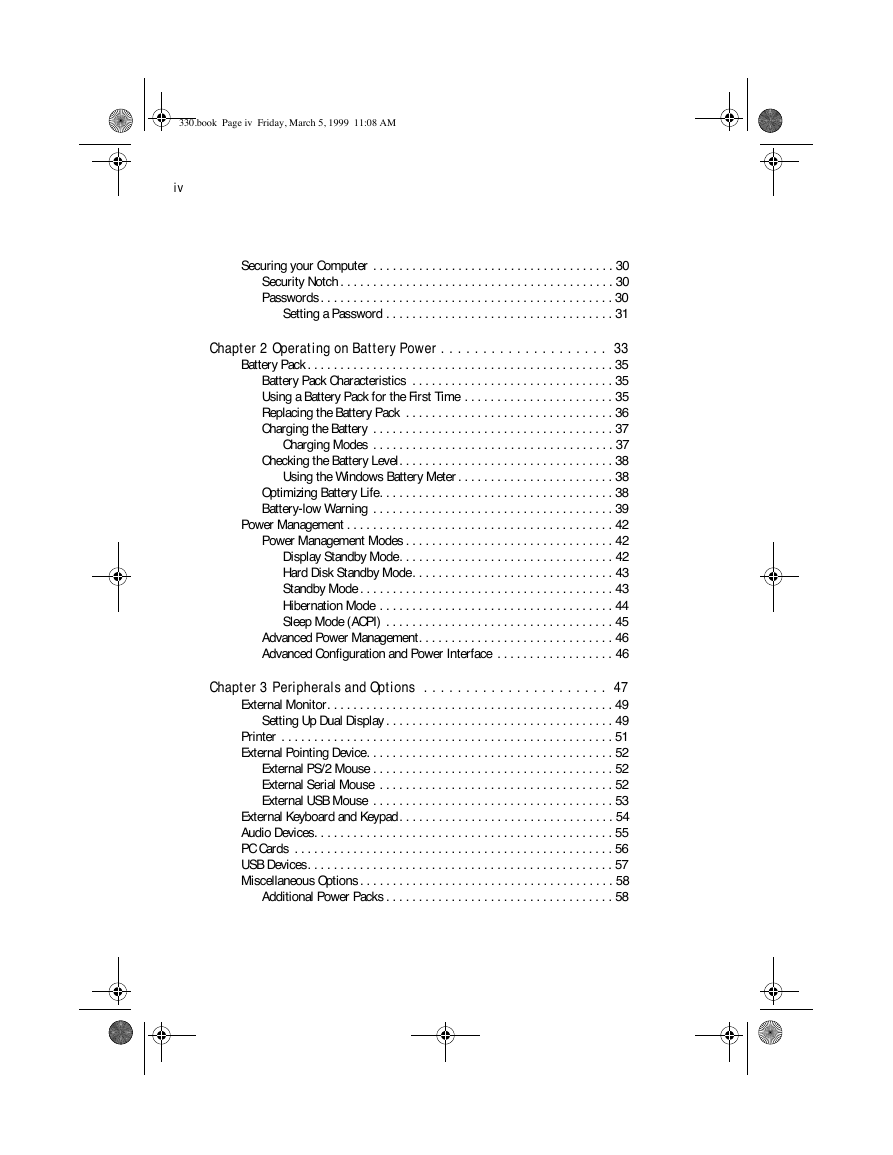
330.book Page iv Friday, March 5, 1999 11:08 AM iv Securing your Computer . . . . . . . . . . . . . . . . . . . . . . . . . . . . . . . . . . . . . 30 Security Notch . . . . . . . . . . . . . . . . . . . . . . . . . . . . . . . . . . . . . . . . . . 30 Passwords . . . . . . . . . . . . . . . . . . . . . . . . . . . . . . . . . . . . . . . . . . . . . 30 Setting a Password . . . . . . . . . . . . . . . . . . . . . . . . . . . . . . . . . . . 31 Chapter 2 Operating on Battery Power . . . . . . . . . . . . . . . . . . . . 33 Battery Pack . . . . . . . . . . . . . . . . . . . . . . . . . . . . . . . . . . . . . . . . . . . . . . . 35 Battery Pack Characteristics . . . . . . . . . . . . . . . . . . . . . . . . . . . . . . . 35 Using a Battery Pack for the First Time . . . . . . . . . . . . . . . . . . . . . . . 35 Replacing the Battery Pack . . . . . . . . . . . . . . . . . . . . . . . . . . . . . . . . 36 Charging the Battery . . . . . . . . . . . . . . . . . . . . . . . . . . . . . . . . . . . . . 37 Charging Modes . . . . . . . . . . . . . . . . . . . . . . . . . . . . . . . . . . . . . 37 Checking the Battery Level. . . . . . . . . . . . . . . . . . . . . . . . . . . . . . . . . 38 Using the Windows Battery Meter . . . . . . . . . . . . . . . . . . . . . . . . 38 Optimizing Battery Life. . . . . . . . . . . . . . . . . . . . . . . . . . . . . . . . . . . . 38 Battery-low Warning . . . . . . . . . . . . . . . . . . . . . . . . . . . . . . . . . . . . . 39 Power Management . . . . . . . . . . . . . . . . . . . . . . . . . . . . . . . . . . . . . . . . . 42 Power Management Modes . . . . . . . . . . . . . . . . . . . . . . . . . . . . . . . . 42 Display Standby Mode. . . . . . . . . . . . . . . . . . . . . . . . . . . . . . . . . 42 Hard Disk Standby Mode. . . . . . . . . . . . . . . . . . . . . . . . . . . . . . . 43 Standby Mode . . . . . . . . . . . . . . . . . . . . . . . . . . . . . . . . . . . . . . . 43 Hibernation Mode . . . . . . . . . . . . . . . . . . . . . . . . . . . . . . . . . . . . 44 Sleep Mode (ACPI) . . . . . . . . . . . . . . . . . . . . . . . . . . . . . . . . . . . 45 Advanced Power Management. . . . . . . . . . . . . . . . . . . . . . . . . . . . . . 46 Advanced Configuration and Power Interface . . . . . . . . . . . . . . . . . . 46 Chapter 3 Peripherals and Options . . . . . . . . . . . . . . . . . . . . . . 47 External Monitor. . . . . . . . . . . . . . . . . . . . . . . . . . . . . . . . . . . . . . . . . . . . 49 Setting Up Dual Display . . . . . . . . . . . . . . . . . . . . . . . . . . . . . . . . . . . 49 Printer . . . . . . . . . . . . . . . . . . . . . . . . . . . . . . . . . . . . . . . . . . . . . . . . . . . 51 External Pointing Device. . . . . . . . . . . . . . . . . . . . . . . . . . . . . . . . . . . . . . 52 External PS/2 Mouse . . . . . . . . . . . . . . . . . . . . . . . . . . . . . . . . . . . . . 52 External Serial Mouse . . . . . . . . . . . . . . . . . . . . . . . . . . . . . . . . . . . . 52 External USB Mouse . . . . . . . . . . . . . . . . . . . . . . . . . . . . . . . . . . . . . 53 External Keyboard and Keypad. . . . . . . . . . . . . . . . . . . . . . . . . . . . . . . . . 54 Audio Devices. . . . . . . . . . . . . . . . . . . . . . . . . . . . . . . . . . . . . . . . . . . . . . 55 PC Cards . . . . . . . . . . . . . . . . . . . . . . . . . . . . . . . . . . . . . . . . . . . . . . . . . 56 USB Devices. . . . . . . . . . . . . . . . . . . . . . . . . . . . . . . . . . . . . . . . . . . . . . . 57 Miscellaneous Options . . . . . . . . . . . . . . . . . . . . . . . . . . . . . . . . . . . . . . . 58 Additional Power Packs . . . . . . . . . . . . . . . . . . . . . . . . . . . . . . . . . . . 58
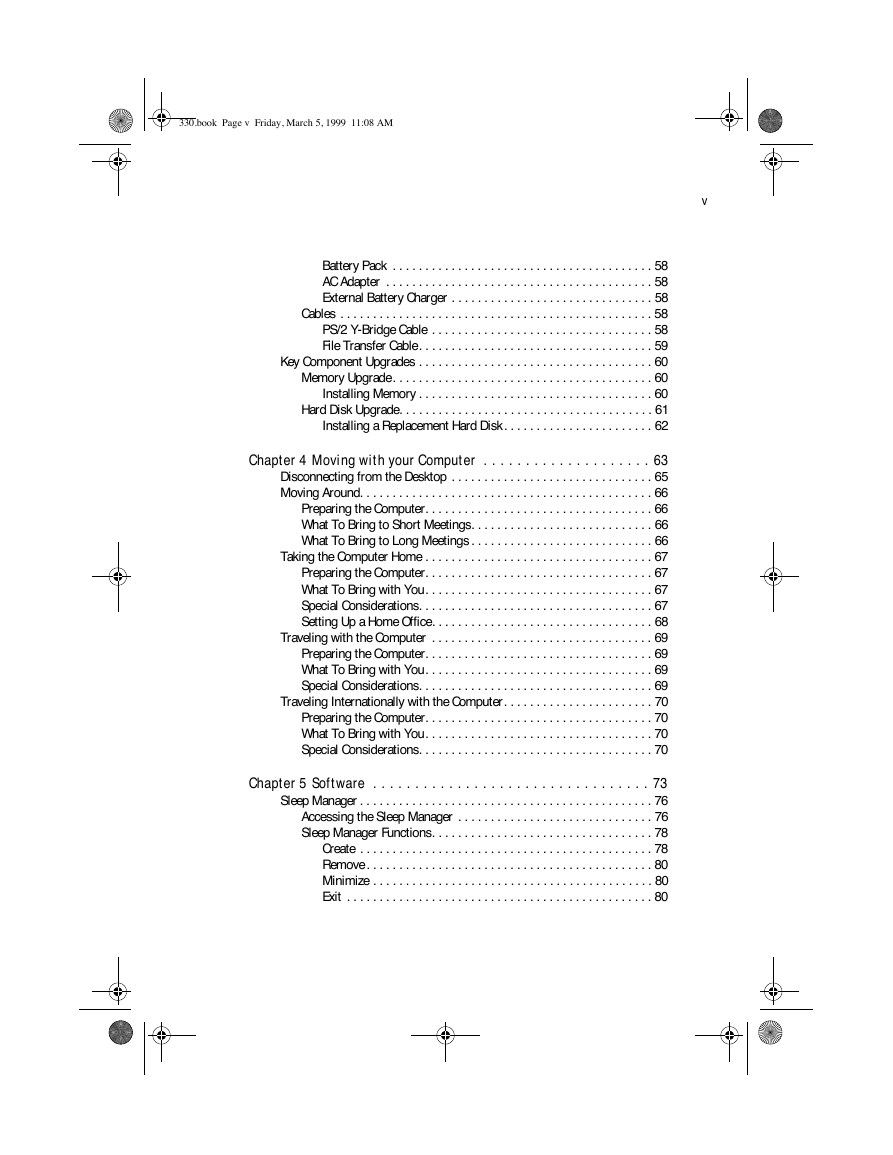
330.book Page v Friday, March 5, 1999 11:08 AM v Battery Pack . . . . . . . . . . . . . . . . . . . . . . . . . . . . . . . . . . . . . . . . 58 AC Adapter . . . . . . . . . . . . . . . . . . . . . . . . . . . . . . . . . . . . . . . . . 58 External Battery Charger . . . . . . . . . . . . . . . . . . . . . . . . . . . . . . . 58 Cables . . . . . . . . . . . . . . . . . . . . . . . . . . . . . . . . . . . . . . . . . . . . . . . . 58 PS/2 Y-Bridge Cable . . . . . . . . . . . . . . . . . . . . . . . . . . . . . . . . . . 58 File Transfer Cable. . . . . . . . . . . . . . . . . . . . . . . . . . . . . . . . . . . . 59 Key Component Upgrades . . . . . . . . . . . . . . . . . . . . . . . . . . . . . . . . . . . . 60 Memory Upgrade . . . . . . . . . . . . . . . . . . . . . . . . . . . . . . . . . . . . . . . . 60 Installing Memory . . . . . . . . . . . . . . . . . . . . . . . . . . . . . . . . . . . . 60 Hard Disk Upgrade. . . . . . . . . . . . . . . . . . . . . . . . . . . . . . . . . . . . . . . 61 Installing a Replacement Hard Disk. . . . . . . . . . . . . . . . . . . . . . . 62 Chapter 4 Moving with your Computer . . . . . . . . . . . . . . . . . . . . 63 Disconnecting from the Desktop . . . . . . . . . . . . . . . . . . . . . . . . . . . . . . . 65 Moving Around. . . . . . . . . . . . . . . . . . . . . . . . . . . . . . . . . . . . . . . . . . . . . 66 Preparing the Computer. . . . . . . . . . . . . . . . . . . . . . . . . . . . . . . . . . . 66 What To Bring to Short Meetings. . . . . . . . . . . . . . . . . . . . . . . . . . . . 66 What To Bring to Long Meetings . . . . . . . . . . . . . . . . . . . . . . . . . . . . 66 Taking the Computer Home . . . . . . . . . . . . . . . . . . . . . . . . . . . . . . . . . . . 67 Preparing the Computer. . . . . . . . . . . . . . . . . . . . . . . . . . . . . . . . . . . 67 What To Bring with You. . . . . . . . . . . . . . . . . . . . . . . . . . . . . . . . . . . 67 Special Considerations. . . . . . . . . . . . . . . . . . . . . . . . . . . . . . . . . . . . 67 Setting Up a Home Office. . . . . . . . . . . . . . . . . . . . . . . . . . . . . . . . . . 68 Traveling with the Computer . . . . . . . . . . . . . . . . . . . . . . . . . . . . . . . . . . 69 Preparing the Computer. . . . . . . . . . . . . . . . . . . . . . . . . . . . . . . . . . . 69 What To Bring with You. . . . . . . . . . . . . . . . . . . . . . . . . . . . . . . . . . . 69 Special Considerations. . . . . . . . . . . . . . . . . . . . . . . . . . . . . . . . . . . . 69 Traveling Internationally with the Computer. . . . . . . . . . . . . . . . . . . . . . . 70 Preparing the Computer. . . . . . . . . . . . . . . . . . . . . . . . . . . . . . . . . . . 70 What To Bring with You. . . . . . . . . . . . . . . . . . . . . . . . . . . . . . . . . . . 70 Special Considerations. . . . . . . . . . . . . . . . . . . . . . . . . . . . . . . . . . . . 70 Chapter 5 Software . . . . . . . . . . . . . . . . . . . . . . . . . . . . . . . . . 73 Sleep Manager . . . . . . . . . . . . . . . . . . . . . . . . . . . . . . . . . . . . . . . . . . . . . 76 Accessing the Sleep Manager . . . . . . . . . . . . . . . . . . . . . . . . . . . . . . 76 Sleep Manager Functions. . . . . . . . . . . . . . . . . . . . . . . . . . . . . . . . . . 78 Create . . . . . . . . . . . . . . . . . . . . . . . . . . . . . . . . . . . . . . . . . . . . . 78 Remove . . . . . . . . . . . . . . . . . . . . . . . . . . . . . . . . . . . . . . . . . . . . 80 Minimize . . . . . . . . . . . . . . . . . . . . . . . . . . . . . . . . . . . . . . . . . . . 80 Exit . . . . . . . . . . . . . . . . . . . . . . . . . . . . . . . . . . . . . . . . . . . . . . . 80
330.book Page vi Friday, March 5, 1999 11:08 AM vi Notebook Manager. . . . . . . . . . . . . . . . . . . . . . . . . . . . . . . . . . . . . . . . . . 81 Information Viewer . . . . . . . . . . . . . . . . . . . . . . . . . . . . . . . . . . . . . . 82 POST . . . . . . . . . . . . . . . . . . . . . . . . . . . . . . . . . . . . . . . . . . . . . . . . . 83 Boot Sequence. . . . . . . . . . . . . . . . . . . . . . . . . . . . . . . . . . . . . . . . . . 84 Password. . . . . . . . . . . . . . . . . . . . . . . . . . . . . . . . . . . . . . . . . . . . . . 85 Setting the Power-On Password . . . . . . . . . . . . . . . . . . . . . . . . . 86 Setting the Setup Password . . . . . . . . . . . . . . . . . . . . . . . . . . . . 86 Power Management . . . . . . . . . . . . . . . . . . . . . . . . . . . . . . . . . . . . . . 87 Setting Advanced Features . . . . . . . . . . . . . . . . . . . . . . . . . . . . . 88 Display Device . . . . . . . . . . . . . . . . . . . . . . . . . . . . . . . . . . . . . . . . . . 89 BIOS Utility. . . . . . . . . . . . . . . . . . . . . . . . . . . . . . . . . . . . . . . . . . . . . . . . 90 Using the BIOS Utility . . . . . . . . . . . . . . . . . . . . . . . . . . . . . . . . . . . . 90 System Information . . . . . . . . . . . . . . . . . . . . . . . . . . . . . . . . . . . . . . 91 Basic System Settings . . . . . . . . . . . . . . . . . . . . . . . . . . . . . . . . . . . . 93 Startup Configuration. . . . . . . . . . . . . . . . . . . . . . . . . . . . . . . . . . . . . 94 Setting the Boot Drive Sequence . . . . . . . . . . . . . . . . . . . . . . . . . 95 Onboard Devices Configuration . . . . . . . . . . . . . . . . . . . . . . . . . . . . . 96 System Security. . . . . . . . . . . . . . . . . . . . . . . . . . . . . . . . . . . . . . . . . 97 Setting a Password . . . . . . . . . . . . . . . . . . . . . . . . . . . . . . . . . . . 98 Removing a Password. . . . . . . . . . . . . . . . . . . . . . . . . . . . . . . . . 99 Changing a Password . . . . . . . . . . . . . . . . . . . . . . . . . . . . . . . . . 99 Power Management . . . . . . . . . . . . . . . . . . . . . . . . . . . . . . . . . . . . . 100 Load Default Settings. . . . . . . . . . . . . . . . . . . . . . . . . . . . . . . . . . . . 102 Chapter 6 Troubleshooting . . . . . . . . . . . . . . . . . . . . . . . . . . . .103 Frequently-Asked Questions. . . . . . . . . . . . . . . . . . . . . . . . . . . . . . . . . . 105 Troubleshooting Tips . . . . . . . . . . . . . . . . . . . . . . . . . . . . . . . . . . . . . . . 110 Using PC-Doctor . . . . . . . . . . . . . . . . . . . . . . . . . . . . . . . . . . . . . . . 110 Online Services. . . . . . . . . . . . . . . . . . . . . . . . . . . . . . . . . . . . . . . . . . . . 112 Before you call . . . . . . . . . . . . . . . . . . . . . . . . . . . . . . . . . . . . . . . . . 112 Error Messages . . . . . . . . . . . . . . . . . . . . . . . . . . . . . . . . . . . . . . . . . . . 114 Appendix A Specifications . . . . . . . . . . . . . . . . . . . . . . . . . . . .117 . . . . . . . . . . . . . . . . . . . . . . . . . . . . . . . . . . . . . . . . . . . . . . . . . . . . . . . . 118 Index . . . . . . . . . . . . . . . . . . . . . . . . . . . . . . . . . . . . . . . . . . 123
330.book Page vii Friday, March 5, 1999 11:08 AM Notices FCC Notice vii This device has been tested and found to comply with the limits for a Class B digital device pursuant to Part 15 of the FCC Rules. These limits are designed to provide reasonable protection against harmful interference in a residential installation. This device generates, uses, and can radiate radio frequency energy and, if not installed and used in accordance with the instructions, may cause harmful interference to radio communications. However, there is no guarantee that interference will not occur in a particular installation. If this device does cause harmful interference to radio or television reception, which can be determined by turning the device off and on, the user is encouraged to try to correct the interference by one or more of the following measures: Reorient or relocate the receiving antenna Increase the separation between the device and receiver Connect the device into an outlet on a circuit different from that to which the receiver is connected Consult the dealer or an experienced radio/television technician for help Notice: Shielded Cables All connections to other computing devices must be made using shielded cables to maintain compliance with FCC regulations. Notice: Peripheral Devices Only peripherals (input/output devices, terminals, printers, etc.) certified to comply with the Class B limits may be attached to this equipment. Operation with non-certified peripherals is likely to result in interference to radio and TV reception. Caution Changes or modifications not expressly approved by the manufacturer could void the user’s authority, which is granted by the Federal Communications Commission, to operate this computer. q q q q
330.book Page viii Friday, March 5, 1999 11:08 AM viii Notices Use Conditions This part complies with Part 15 of the FCC Rules. Operation is subject to the following two conditions: (1) this device may not cause harmful interference, and (2) this device must accept any interference received, including interference that may cause undesired operation. Notice: Canadian Users This Class B digital apparatus meets all requirements of the Canadian Interference-Causing Equipment Regulations. Remarque à l’intention des utilisateurs canadiens Cet appareil numérique de la classe B respected toutes les exigences du Règlement sur le matériel brouilleur du Canada. Modem Notices FCC This equipment complies with Part 68 of the FCC rules. Located on the bottom side of the modem is a label that contains, among other information, the FCC Registration Number and Ringer Equivalence Number (REN) for this equipment. Upon request, you must provide this information to your telephone company. If your telephone equipment causes harm to the telephone network, the telephone company may discontinue your service temporarily. If possible, they will notify you in advance. But, if advance notice is not practical, you will be notified as soon as possible. You will also be informed of your right to file a complaint with the FCC. Your telephone company may make changes in its facilities, equipment, operations, or procedures that could affect the proper functioning of your equipment. If they do, you will be notified in advance to give you an opportunity to maintain uninterrupted telephone service. If this equipment should fail to operate properly, disconnect the equipment from the phone line to determine if it is causing the problem. If the problem is with the equipment, discontinue use and contact your dealer or vendor.
分享到:
收藏